Monday 30 June 2014

Wooden Toy Painting

So predictably, as well as Theo's Pallet Play House, I have a few more of Maria's birthday presents from last week to share here. Last time I was making Gnomes (back here), Maria was desperate to paint them and I decided I'd make her some of her very own to paint for her birthday. So here they are:

Head over to Wee Folk Art for Gnome inspiration

And sticking with the painting wood theme, I remembered these figures I bought quite a while back from a lovely Etsy shop, Clickity Clack

The Three Bears - beyond my wood cutting abilities.
I bought them thinking that I would paint them perfectly, with beautiful, intricate, accurate detail (well, nearly maybe!) and then give them to Maria. But I realised that actually she'd much rather receive them unpainted and get to do it herself. Wanting them to look 'perfectly painted' was purely my own misguided agenda. I did wood burn some detail on before giving them to her, and I managed to make a slightly wonky Goldilocks too:


Along with the bears I'd also bought this Rainbow Stacker from Clickity Clack:


And again this seemed perfect, on reflection, to let Maria enjoy painting. I gave her a rainbow selection of her own acrylic paints as well (as soon as she saw them she decided her Rainbow Bag was the perfect place to store them!), so she's been having lots of fun painting them all over the last few days.


And of course her 'pictures' for her Play House too:


Incidentally, I left her doing this just outside the kitchen door today while I tidied up a bit - it does occasionally happen! When I popped out to see how she was getting on I found she had finished her pictures and moved on to her hands...


And legs...


I think the moral of this story is clearly that I shouldn't bother tidying the kitchen - the bath was far worse to clean after the bluest bath ever!

Anyway, here are the gnomes:


The Three Bears collection:


And the Rainbow Stacker:


I love them all, and so does Maria, but I think it's amazing what a transformation the colour makes to the Rainbow in particular. Maybe that's kind of obvious and a bit of a stupid thing to say, but it really is just gorgeous now:


And wouldn't this be a lovely present for an older sibling to paint and give to their little brother or sister? (Assuming safe paint and 'sealant' was used of course - we finish our wood makes off with an olive oil and beeswax combination, by the way - find details at Wee Folk Art.)

There's been more painting and another present to show you but this is feeling plenty long enough already, so that's it for tonight!

Sally.

Friday 27 June 2014

This Moment

Here's a link to Soulemama's moment, and here's mine...

{this moment}

. . . . . . . . .
{this moment} ~ A Friday ritual. A single photo - no words - capturing a moment from the week. A simple, special, extraordinary moment. A moment I want to pause, savor and remember. If you're inspired to do the same, leave a link to your 'moment' in the comments for all to find and see.
. . . . . . . . . 


Thursday 26 June 2014

Pallet Play House

I'm afraid I've been missing from around here for a few days again. Everything has been far too busy. Little bits of making have been squeezed in here and there, but I just haven't managed to squeeze in time for writing here.

All of the making has been for Maria's birthday (yesterday!), but for this particular birthday a very important part of the making hasn't been mine. Back in May Soulemama wrote about this gorgeous little playhouse that her children made as a present for her littlest one. I showed the post to Theo, who, over the past year or so, has discovered a love of creating all sorts of things from the scraps of wood we have piled up in the garden. It fired up his imagination just as I'd hoped it would, and he decided to make a house for Maria for her birthday.

Theo's building techniques don't involve spirit levels or measuring or anything like that (can't think where he might get this from!), they usually involve whatever wood is to hand, a huge number of large nails and a hammer. His biggest creation has been his 'tree house'. It's very difficult to take a good photo of this, it really has to be seen to be truly appreciated!


It has one main 'room', but also a smaller downstairs area and a secret 'basement' (sort of tunnelled down into the hedge) and a hatch up on to a 'sun roof'.


Maria's house followed the same basic principles, but on a much simpler level (and thankfully on the ground!). He decided to make the house out of some old pallets.

 Initially he went for a flat roof, but then realised Maria wouldn't be able to stand up in it, so changed to a pitched roof.

He cut out sections for windows, and added shelves and a little storage compartment with a hinged lid. It was sort of impossible to keep it hidden from Maria, but she's so used to Theo banging nails into wood that she happily accepted his explanation that it was an 'extension' to his tree house. When it was finished, Theo decided that it would look good painted so we went off to buy some, taking Maria with us. We took her advice on which colours would look good, and Theo let her help him paint it - which she loved!


 At the start of the week, there was a flurry of finishing touches, especially sign painting, and then varnishing.


The building site was tidied up and it was all ready for her birthday.

You might notice the splatters of red paint all over the cream coloured wall behind - never mind! I'm half tempted to let them splatter it with all sorts of other colours too so it looks deliberate!


Theo's sign hangs permanently on the roof.


Venetia's signs can be hung up as and when required:


Maria can flip this one over if she's in the mood for running a cafe instead (she frequently is!)...


And Venetia painted a reversible 'Open/Closed' sign too.


Theo had included a 'blackboard' for Maria (we added tile grout to the paint we were using - as per instructions here at A beautiful mess). So far this has been used as a menu board.


And Maria is keeping her chalk in the little hinged compartment you can just see here...


Maria was incredibly excited to find out that the house was actually for her, and she loved all the finishing touches.


Theo had even made her a little window box with some strawberry plants in it.


The little 'screen' is a tiny solar panel! But we've now decided it might be safer up on the roof instead. It powers some little fairy lights that are strung around the house - but it's been getting dark too late for Maria to see these in action yet.


And there are a few finishing touches that we've left for Maria to do. We gave her 3 pieces of wood, with holes drilled in them for hanging, so that she can paint some 'pictures' for the walls inside her house.


It was such a special birthday present for everyone involved, and I'm very grateful for Soulemama's amazing children starting us off in the first place. Blogs really can be wonderful things!

Sally.

Friday 20 June 2014

This Moment

Here's a link to Soulemama's moment, and here's mine...

{this moment}

. . . . . . . . .
{this moment} ~ A Friday ritual. A single photo - no words - capturing a moment from the week. A simple, special, extraordinary moment. A moment I want to pause, savor and remember. If you're inspired to do the same, leave a link to your 'moment' in the comments for all to find and see.
. . . . . . . . . .


Wednesday 18 June 2014

Take Five

1) Whilst Sari sewing is fresh in my mind (here and here), I dug out a few photos of a 'quilt' I made from old saris a little more than a year ago. It was just pre-blog, and was a present for a new born baby.


I thought it would be good to make a really lightweight quilt - more of a patchwork sheet really. The silk sari fabric is obviously very soft and fine, and I just backed it with a bright pink flannel sheet, no batting of any kind in the middle - so perfect for a baby born at the start of Summer.


The thinness allows the light to shine through beautifully. 


2) You may have noticed I've changed my 'Header' a little. So much of my blog lay out is exactly the same as when I first started out nearly a year ago, and basically I didn't really have a clue what I was doing then (not that I have much more than half a clue now!), so I thought it was maybe about time I updated things a little. And the beautifying your blog tips at Sew Many Ways and Sew at home Mummy definitely encouraged this. Many of the blog posts in the New Quilt Blogger Blog Hop are also including blogging tips which are very useful. I found the tip from Cozy Capatiller really interesting - about making your blog more readable from mobile devices. As someone who never uses mobile devices this really wasn't something that had occurred to me before. And Marcia, from Cozy Capatiller, very kindly checked me out on a mobile device, and apparently my main problem is that now I've changed my background to white, the white 'Wonky Patchwork' title text and description doesn't show up anymore - so apologies to any mobile users out there, I'll try and get round to sorting that out too!

3) I was very interested in this post at Kids Activity Blog the other day, on exploring how incredible our brains are and encouraging them to 'adapt'. The book that's mentioned sounds intriguing too. Definitely worth looking into more with the children.

4) Venetia discovered the first of our hydrangeas had started to flower the other day, and picked me 3 gorgeous blooms, just tinged with pink.


Beautiful - and I felt the urge to go and photograph them after reading this sweet post here.


5) Wild swimming has started in earnest for the year - our river is open for business again! Hurray! The water level in the river near us has finally gone down enough to make proper swimming safe again. And we're all loving it.


The sea always feels like a very spectacular, amazing expanse of water. I love swimming in the sea, and probably find it more exhilarating than the river, especially if there are waves. But there's something very special about swimming in the river. It feels more peaceful and secluded, somehow more personal than the sea. And for me, without fail, a dip in the river works wonders at washing away the stresses and worries of the day. It leaves me feeling refreshed and renewed, and incredibly thankful to be alive and in that moment. I don't know whether the children feel any of that, even unconsciously, but they certainly love it there, and I'm sure it does leave them refreshed. They all love wild swimming and I'm hoping, with a fair amount of confidence, that this is something that will stay with them for life. I came across a lovely, short video clip the other day - about wild swimming and its benefits to mental health, if you have a minute find it here. And if you have a safe river you can get to, then definitely go and jump in it! Even the coldness is part of the attraction! I might happily morph into a 'Making and Wild Swimming' blogger for the next few months!

Sally.

Monday 16 June 2014

Dress from a Sari

So do you remember the Fairy Wings I made from an old silk sari last week? Here's my other very recent Sari finish - a silk dress.


Maria is getting a lot of attention round here these days, and as much as she needs it at the moment, the other children also need their fair share. I don't want them to feel less special because they're dealing with issues much better. So I thought it would be good to make something for Venetia, with lots of creative input from Venetia. And this silk dress is the end result.

We started out with this bought dress, which Venetia loves, and she thought I might be able to replicate! 


You probably know by now I don't like patterns and I'm rubbish at trying to follow them. I don't know why, but muddling through, and kind of making my own pattern as I go, always seems a much more attractive option! So we gave it a go.

I started out with the neck pieces, drawn roughly on some scrap paper and cut out.


I wanted to use a contrasting fabric for the neck, but I really couldn't find one that worked with my sari fabric. So I decided to introduce some patchwork too! I cut out a plain cream piece of fabric and a pale purple backing piece for each neck section.


Then I started to sew pieces on to the 'outer' cream fabric.


Right sides together then iron open


I really didn't plan very well at this stage. I should have cut out all my pieces for this right at the start of this part of the process, so my pieces matched up and were symmetrical from the centre out. But I didn't think about that till too late, so there was a certain amount of trial and error to get it symmetrical - like these 4 seams on this last brown piece!


But I ended up with this...


Which, though not exactly symmetrical, was good enough for me. I probably wouldn't have thought to use the brown as my third colour here, but it was the contrasting colour already picked out in the sari, and these brown pieces were cut from the sari itself. And now it's done I really like the combination.

Anyway, next I thought I'd put a bit of 'quilting' on there too, just to tie it all down nicely and add some more detail. I drew a design on first...


And then sewed it...


Once I had both neck sections done like this, I thought a bit of thin brown edging around the front neck section would look good. So I folded a thin strip of brown in half, and pinned it upwards on my front neck piece.

The raw edges are along the bottom raw edge of patchwork, and the fold is upwards.
 Then I pinned on my paler purple 'backing' piece, right sides together, and with the thin brown edging strip hidden inside...


I sewed this top and bottom, trimmed it up and turned it the right way around (via the still open sides)

I ironed the brown edging down.

I did the back neck piece too and it was all starting to come together. Now I needed my dress pieces. So I just laid the original dress out on my fabric as a guide - remembering to cut it wider at the top to allow for the gathering.


This is the back piece, the front had a little more width at the neck.


Then I sewed a thin hem on the arm holes...


And pinned each piece to the underneath of my neck pieces, gathering gently as I went. Here's the back of the dress (no brown edging at the back)...


I sewed it down, and when both front and back neck pieces were done, I pinned the side seams of the dress together and sewed them. I would have then done a hem at the bottom, but with this dress the 'bottom' was the edge of the sari and so it was already finished nicely for me and didn't need hemming. All done:


I made the neck more complicated than was necessary with the patchwork, really if you had the right kind of fabric, this style of dress would be incredibly quick and easy to make. Ideally some stretchy fabric would be great because I found I had one other complication - the original dress was made of stretchy jersey type fabric, whereas mine was very unstretchy silk. I thought, when I cut out the neck pieces, that I'd made enough allowance for this, cutting it deeper than the original so that it would still fit over Venetia's head - but it didn't quite! So I had to do a last minute slash in the back of the neck piece, turn over a very narrow hem and add a button and loop fastening - photo of the back coming up in a minute which will show this a little bit.

Venetia loved it, both the look and the silky feel of it.

With hindsight I wish I'd made it longer.

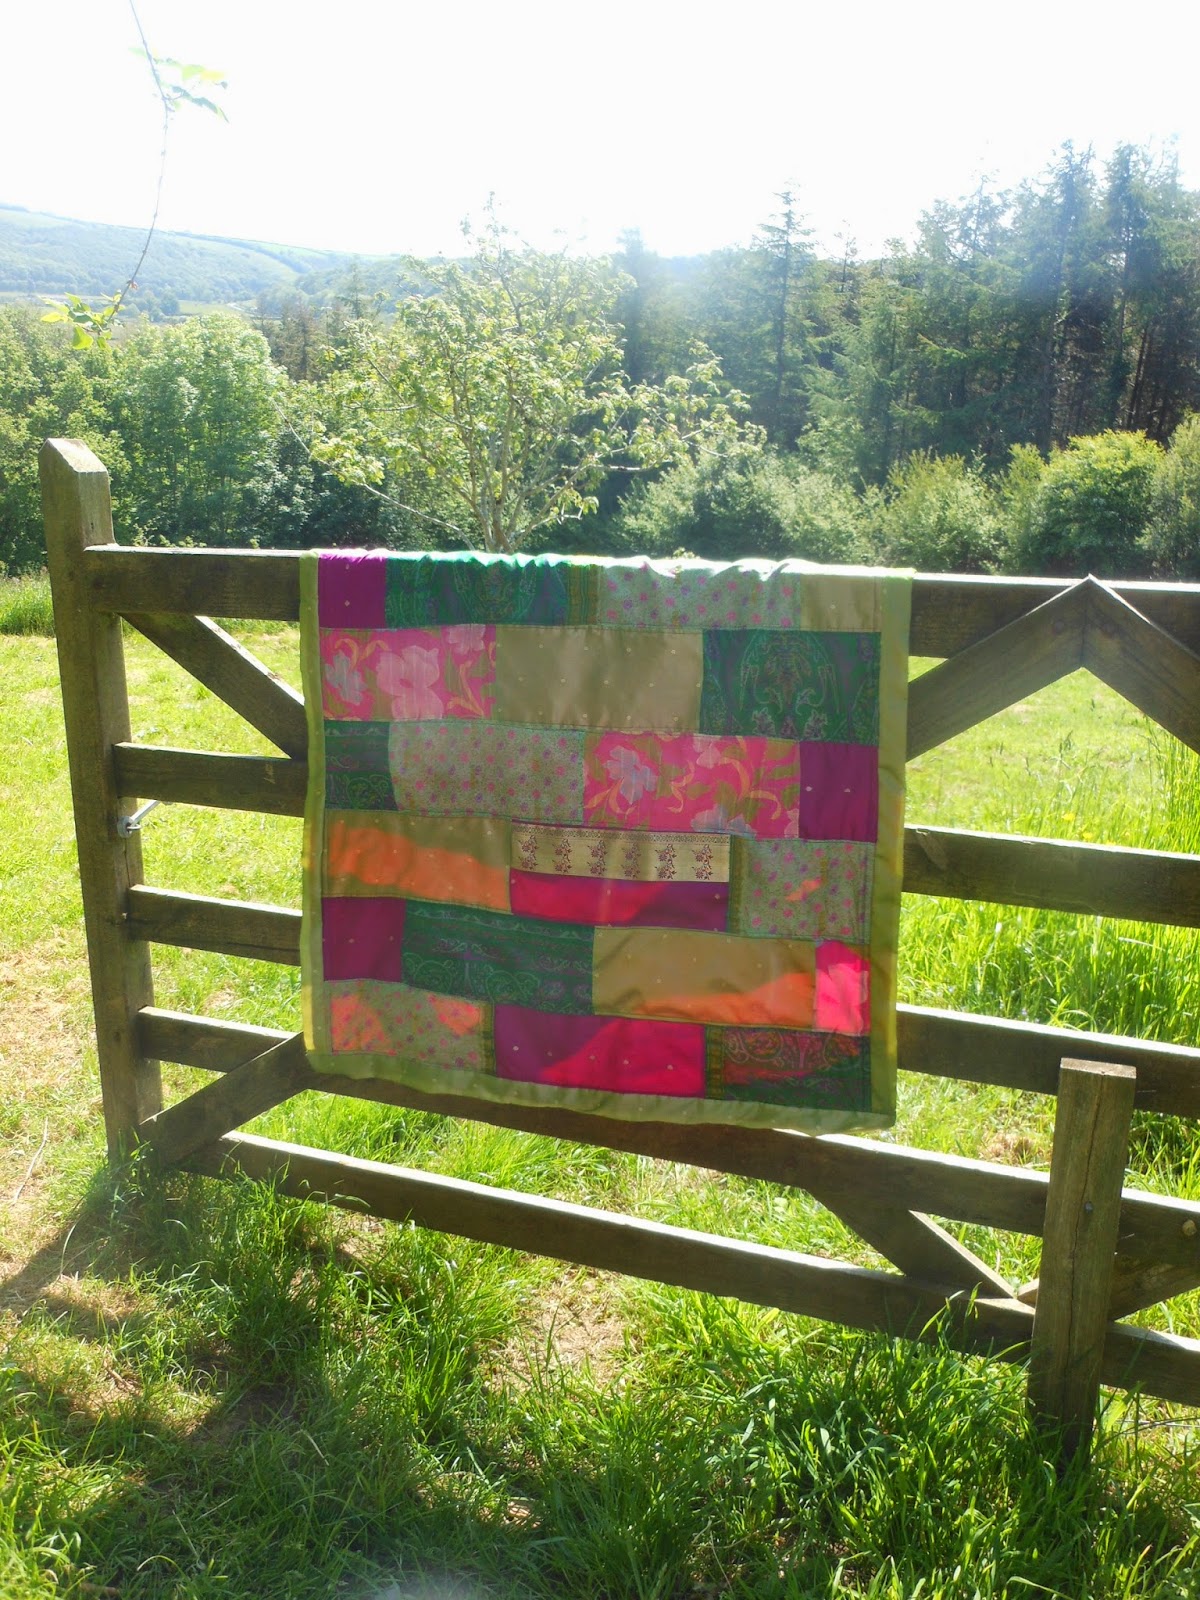
And she also grabbed the rest of the sari as we went out to take photos, which helps to give you an idea of just how much lovely fabric you get when you buy one of these. And maybe also an idea of how great they are for playing and dressing up possibilities...


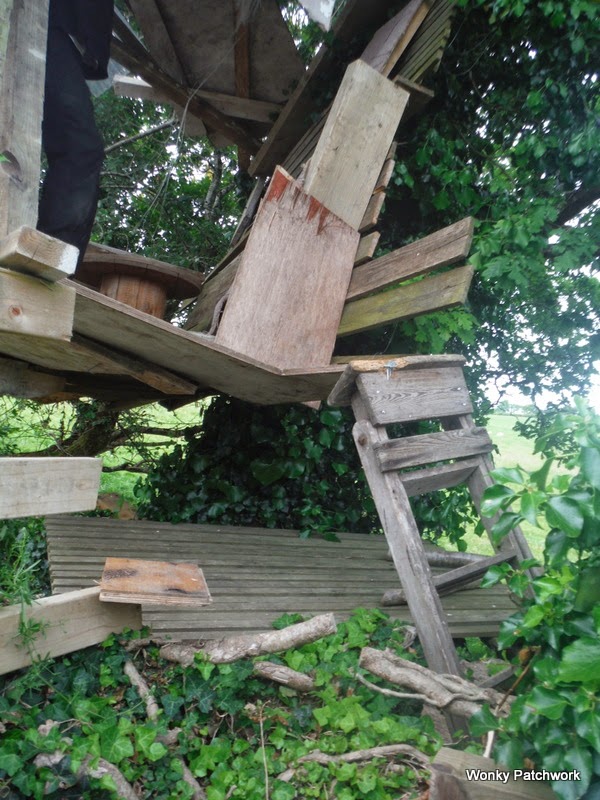
And they don't have to come in particularly girly colours. A more boyish colour scheme gives lots of options for den and tent building.


 It also gave me the idea that I really should make Venetia a simple silk scarf to go with her dress. And here she is today with that finished too.

You can see the slash in the back with the button fastening a little bit here.
 It was just the kind of finishing touch she loves.


And great for photo fun too!


 I don't think I'm much good at providing fool proof tutorials, or patterns that you can follow to the last detail. But hopefully I might make you think you could try taking a favourite item of clothing and copying it yourself. The worst that can happen is that it doesn't work! And you probably wouldn't have completely wasted your time, I always learn far more from doing things wrong than from getting everything right first time.

And although Sam and Theo don't so much appreciate having silk dresses made for them, they have been getting their own special and particular, one to one time - with trips to a cricket match and the cinema respectively and girl free trips to the sea and the river for wild swimming. And they're all being very caring and understanding with Maria at the moment too, I think she's everyone's 'baby', not just mine!

Back again tomorrow,

Sally.