
I think maybe I need to rename this blog, the word 'rainbow' seems to be inexplicably missing!
Another birthday present, of course, for Maria. But if you would like to make a mermaid doll, rainbow tailed or otherwise, then it is much easier and more doable than you might think. This one is created very much along similar lines to the Clara doll I made earlier in the year - here.
I started out drawing a basic shape, and cutting it out of a doubled up piece of neutral fabric.

I cut an extra head shape with this doll - just to help stabilise it when I was machine sewing the facial features and so that I didn't have to worry about the start and end of my stitching showing through to the front of the face.

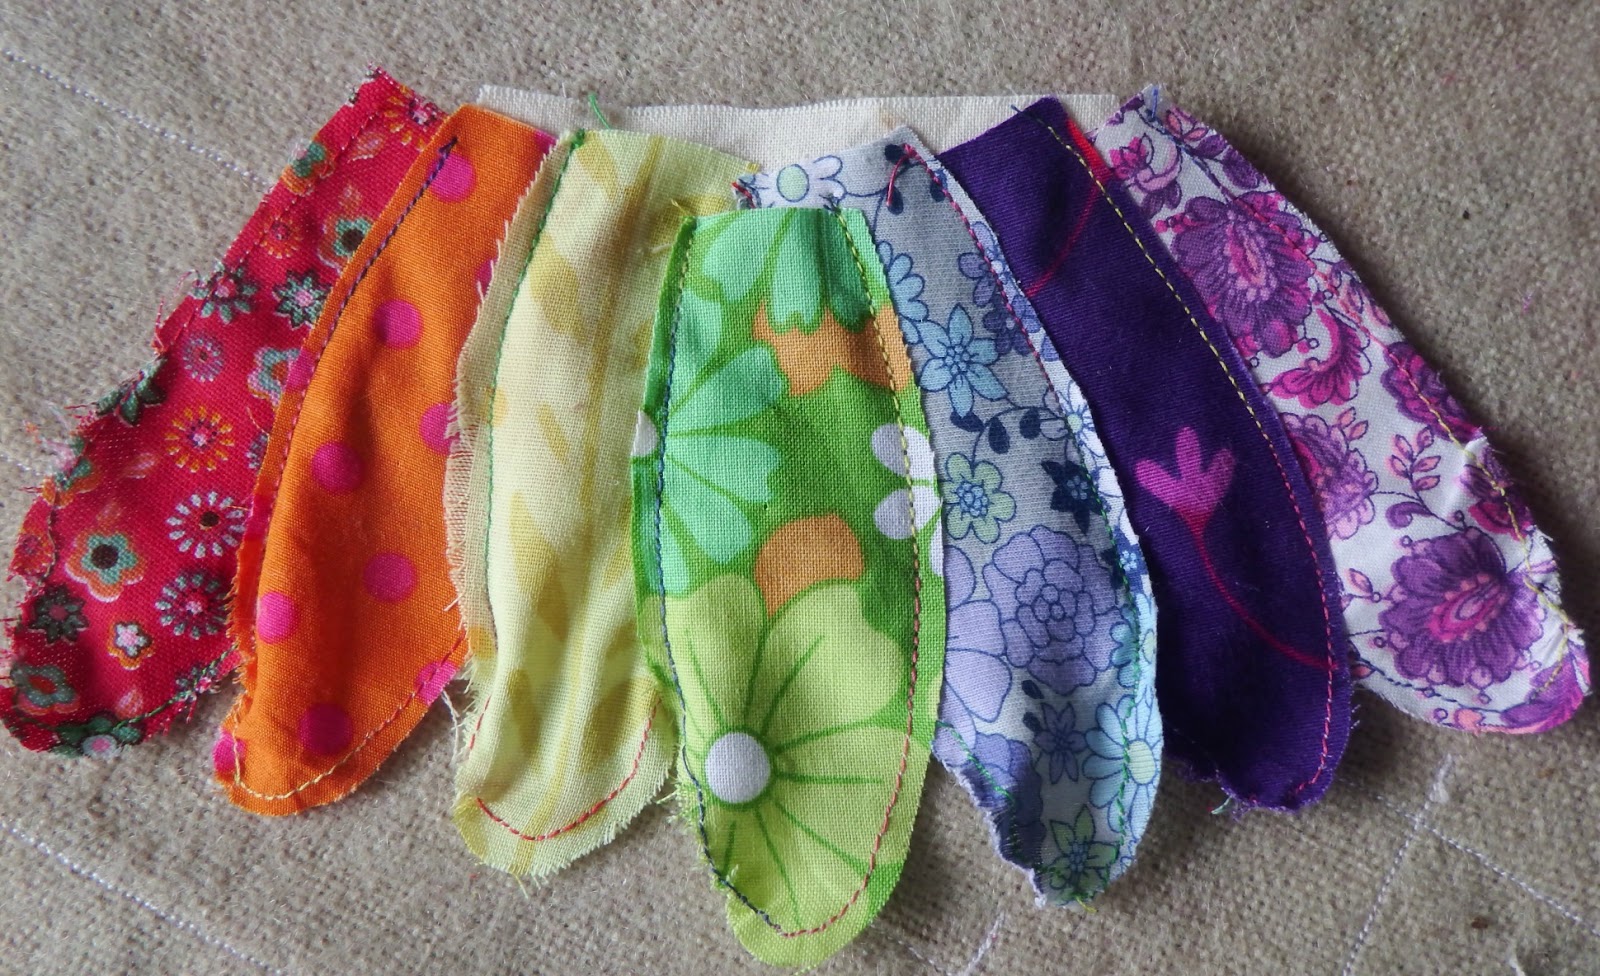
I started out on the tail, and cut lots of 'scales', a quick check to see if I had about the right number and I was good to go.

Then, as with Maria's mermaid tail, I began at the bottom. And, again as with Maria's tail, I hadn't quite decided how I was going to tackle the fanned out bottom section of the tail yet, so I just pinned these 3 'violet' scales rather than sewing them down at this stage.

Then the indigo scales...

Which I did sew down.

And I continued up the tail with each colour in turn, being sure to cover the top of the previous row each time and any gaps there.

If I make another one, I'd mark it out in advance with a soluble pen before sewing each row down - partly to make it more even (you can see the yellow row is quite narrow here) and partly so it's easier to make the reverse of the tail identical, so they match up when eventually sewn together.

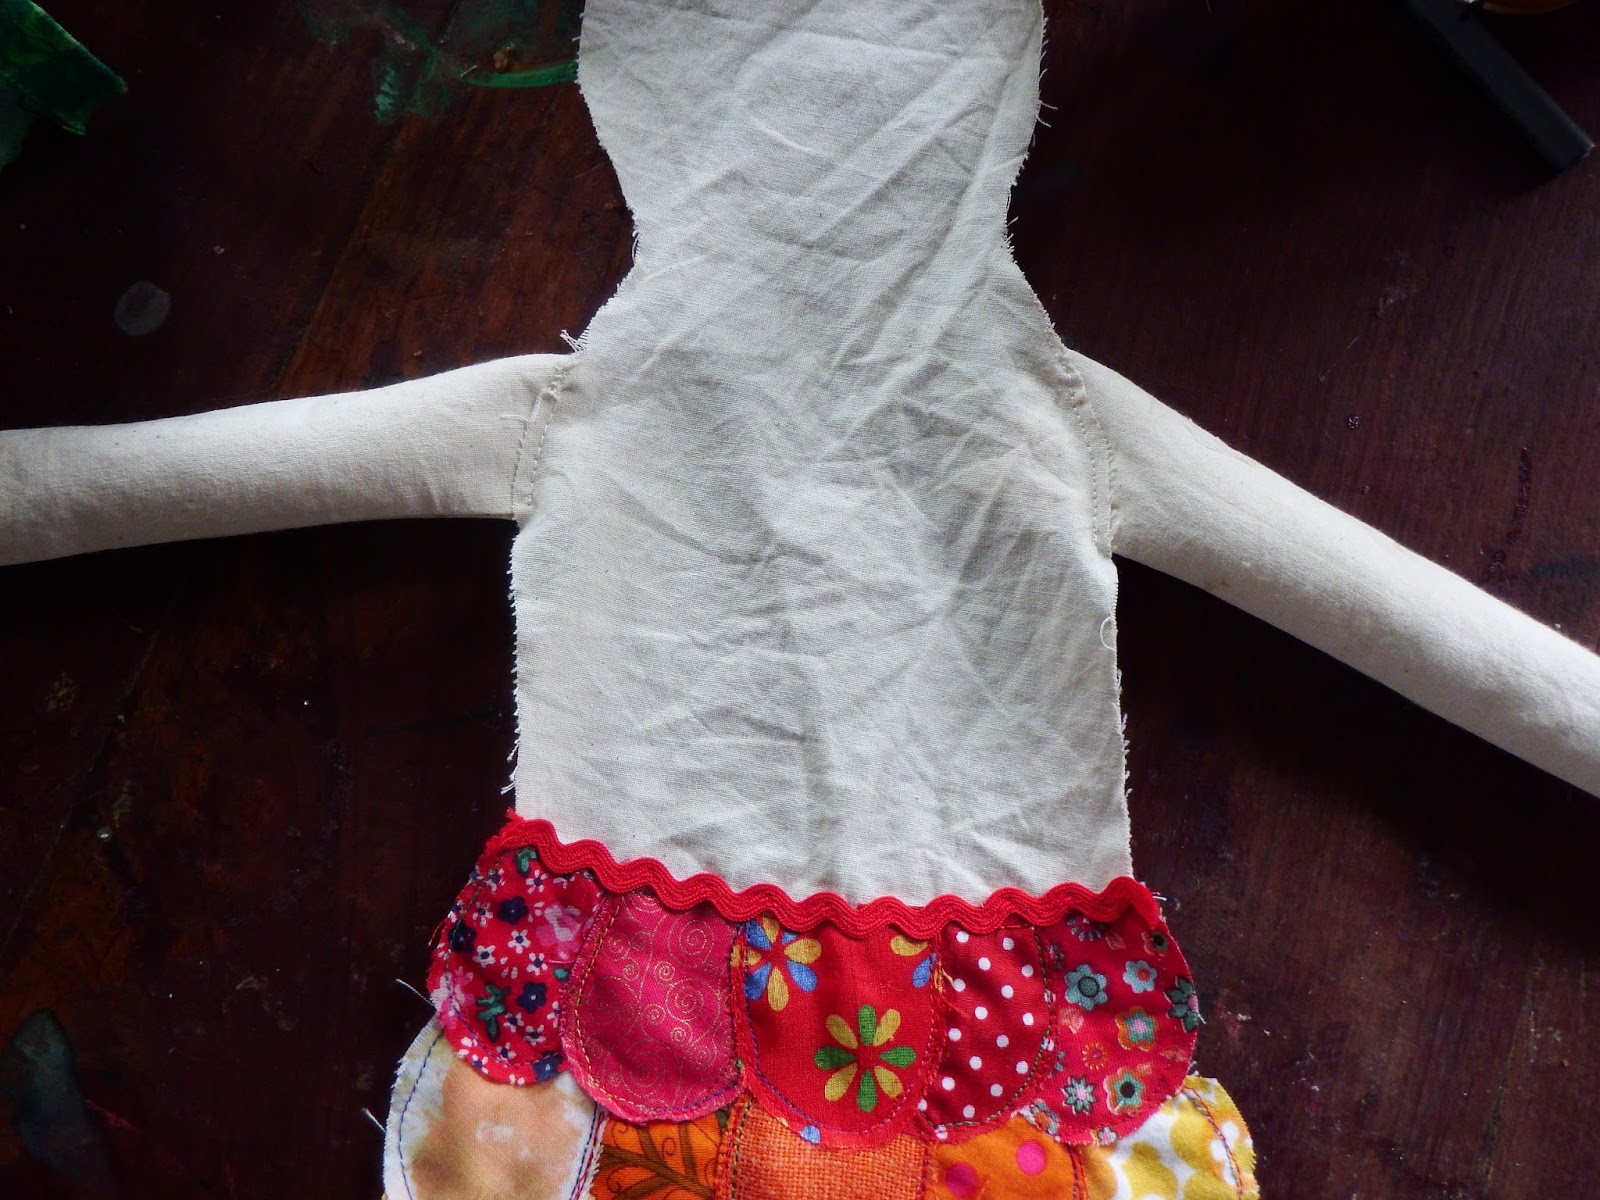
When I got to the red row, I ironed under a little hem at the top of the scales before sewing them down.

Just to neaten it up a bit.

Then I sewed around all the scales again just to secure them more thoroughly. And I decided some red ricrac along the top would be a good extra touch as well.

While I was at it, I also added a little belly button, Maria likes putting belly buttons on her drawings!

Then I did exactly the same thing with the back of the mermaid - trying to keep my spacing the same (see above comments re marking it out in advance!)
For the face, I machine sewed the outlines of the eyes, nose and lips in black thread (on the doubled up fabric), and then added some colour with fabric pens/crayons.

By this point, I'd come up with a plan for the bottom fan part. And I chopped it off...

It's hard to see in the photo above, but I also sewed half way down the middle violet scale, to be sure they were held in place.
Then I cut an identical fan shape from an old wool blanket, for some wadding...

And cut larger 'scale' shapes for this section...

I started out at each end and sewed these longer 'scales' down.


Finishing with the middle green one.
I struggled a bit with these, I think my machine is in fairly desperate need of a service, it's really not feeding through very well at all. And at this point it was just eating these scales rather than sewing them. I had planned to do exactly the same thing with the back of the 'fan' and then simply sew them together just around the edges. But because it was chewing them up so badly, I sewed my second side directly on to the first, with the wool wadding in between. The extra thickness helped to stop my machine eating it.


But it did mean that my stitching came through to the first side of the 'fan'.

Now I cut out some arms...

Sewed them right sides together and turned them back out again. I sewed around twice again to make them more secure.

And lightly stuffed them.

Then sewed them on to the back piece of my mermaid to hold them in place.
To keep the arms tucked out of the way while I sewed the front and back together, I held the 2 arms together with an elastic band - looks slightly odd in this photo, as if the poor mermaid has been kidnapped and tied up!

Then I pinned the 2 mermaid pieces together, right sides together, with those arms tucked in the inside.

I sewed all the way around (twice), leaving just the bottom of her tail open, and turned her out again.

And carefully stuffed her, from the opening at the bottom...

I took my 'fan' piece, slotted it into the opening, and pinned it in place...

Then sewed the opening closed along those violet 'scale' sides.

All done by machine, but I did then have to hand sew on some wool hair...

The bottom of her tail works really well,

The one thing I'd like to improve is to try and make her a bit more malleable around her middle and bottom. She's sort of a bit too much one solid piece, and so can't 'sit'. I could have her tail from a separate piece of fabric initially, but once the tail piece is sewn to the body and then the whole thing stuffed I'm not sure it would make much difference. Something to think about though. And Maria is very happy with her, which again is the important thing.
Have a great weekend.
Sally.
Too cute! I've been wanting to venture into doll making for the sole purpose of making my cousin a doll. She is obsessed with Black Widow from the Avengers, but finding anything Black Widow is nearly impossible. The only solution, of course, is to make one! :)
ReplyDeleteThis is adorable Sally, and I know will be treasured by Maria. Happy weekend, my friend. xo
ReplyDeleteI love your creativity. The fact that Maria loves the mermaid is all that matters, but I am curious how you will adapt for more flexibility in the future. I remember old rabbit dolls my mom sewed for me and I seem to recall that the arms had "elbow" joints that were stuffed then sewed shut midway then stuffed again for a hinge... if that makes any sense.
ReplyDeleteHi again! (I've just commented on another post:) I've just spent ages browsing your old posts, I really can't believe how much you make and his beautiful everything is. You're so brilliant! And how lucky your kids are to have a Mum like you. I have 3, no idea how you manage to get all that done with 4 kids around! Do you just not sleep ?!
ReplyDeleteLooking forward to reading more of your creative adventures :)
Jillxo
she's gorgeous xxxx
ReplyDeleteShes so cool!
ReplyDeleteShe needs a shell bra!
ReplyDeleteOh she's fabulous! I'm glad Maria likes her. As for getting her to sit, could you put the fold into the tail? So working from the top down you might have a couple of rows of scales that are part of the body and are stuffed and then on the inside the stuffing stops and the tail becomes more floppy so you can sit her up on the bottom of the body stuffing and just let the tail drape - it's that or my only other idea is to use one or two of those foam hair bendy rollers we had as teenagers so that you could bend and unbend and the mermaid would hold position. I know you'll come up with something creative and I'm looking forward to seeing what it is :)
ReplyDeleteSuper cool! And thanks for the tutorial!
ReplyDeleteWhat a marvellously characterful, colourful mermaid! Just amazing Sally x
ReplyDeleteLove it! wonky patchwork=rainbow!!!
ReplyDeleteOh my gosh! Sally, you make the funnest things! The rainbow cat is so pretty, and this mermaid is absolutely delightful. :D
ReplyDeleteYour kids are so lucky to have a mum who not only sews, but who goes the extra mile to sew something that is just perfect for each child and at the particular stage they are at.
ReplyDeleteIt must be nice to be a mermaid during the long hot summer and spend all your days in the sea. Especially when you're so pretty :-)
ReplyDeleteAmalia
xo
So much detail and care, another beautiful piece that is just bursting with love...
ReplyDelete