Tuesday 30 September 2014

Little Girl's Nightgown Number 2


So this one is for Venetia. She has a nightie already that is a little similar in style, which she loves, but it is getting very worn, not to say ragged in places.

This one is from a thrifted duvet cover. It's a surprisingly thin fabric, too thin to be any use as a quilt back for instance. And it has a few worn areas itself, which I think feet would quickly start to go through if it stayed as a duvet cover. But there's plenty enough good fabric for a few nightgowns or dresses or whatever else might pop into my head.

I used one of Venetia's current tops to give me an idea of size...

If you do something like this then obviously be sure you allow enough fabric for seams and hems, and be careful you compare all areas for sizing - it's very easy, for instance, to forget to get the size of the armholes right.

And cut out 4 pieces, a top and a bottom but on a doubled up piece of fabric...


I did scoop out a deeper neckline in the front top piece, but that was the only difference. I sewed the top pieces together at the shoulders, and then drew an arm piece which had a gentle curve, in line with those arm holes but longer, to allow for gathered up sleeves.


Then I sewed on the bottom pieces, right sides together, gathering them evenly as I went. Obviously pinning or basting can help with keeping those gathers even, but I try and avoid pinning or basting wherever possible!


And then - and I feel like I always do this! - I must have got too excited that it was all working and I'd nearly finished, because there's a distinct lack of photos until it is finished! My next step was to sew all the way down both sides from the bottom of the arm holes. Then I hemmed each sleeve piece ready to attach. Sewing the sleeves in was very much the same as sewing on the bottom pieces, they were just little capped sleeves, so I started very close to the bottom of the arm holes and, gathering gently as I went, sewed them to the main dress, right sides together as ever. Finishing just before the bottom of the arm holes on the other side. With the gathers on the sleeves, I made sure that most of my gathering was right in the middle at the top of the shoulder, to give it that slight puffed up look.


I cut and hemmed an opening at the back, with a little button loop sewn in. And then sewed a thin strip of fabric to 'bind' the neckline, just as I might machine bind a quilt really.


Nearly there now. I hemmed the bottom and then machine stitched some lace around my top/bottom join. The lace was just some very basic white thrifted, lace which I bought long ago, and for some reason the girls and I 'dyed' lots of it various different colours, with watered down acrylic paints. This was so long ago that I really can't remember what it was for, but there was enough of a perfect pinky-purple colour left over for this dress. And I do remember that 'dyeing' it was very easy - either by putting it into a small pot of watered down paint, and swirling it around a bit, or actually painting it on the lace if you wanted it multi-coloured. Then we let it drip dry outside before either popping it into a hot tumble dryer or ironing it to 'set' the colours. With this kind of 'dyeing' I always wash it on it's own first too, to be sure the colours are OK. Anyway, it's a very easy way of getting just the right colour lace.

Once it was finished I spotted a small hole in the fabric, but a quick flower sewn over it sorted it out, and unless you look very closely it's really hard to see.


So here it is all finished.


And again it was amazingly quick, easy and fun to make. Hopefully you can see that just from the very basic pieces which I cut out. I'm sure Venetia will love it, it's very much her kind of thing. And again it's a style I could see myself making as a dress or even a tunic top. The only thing that has felt slightly strange and concerning, about both this one and yesterday's night gown, is that, because they are both secret presents, I haven't been able to get the girls to try them on for size as I've been making them. But I feel reasonably confident just from using their existing clothes, and hopefully the styles are also quite forgiving, neither is fitted in any way really, and neck and arm holes are quite generous.

I'm on a bit of a roll with night gowns now, you might get bored with them soon!

Sally.

Monday 29 September 2014

Little Girls' Night Gown


This one is a Christmas present - hurray, one down, lots to go! 

I've decided to make the girls some nightgowns - good for Venetia because she loves to wear a pretty night gown, especially if it's long; and good for Maria because she's always inclined to stay up late then just tumble into bed in whatever she's wearing. I have plans to hopefully make 2 (or maybe even 3!) each, and I've gathered up a pile of possible fabrics to dip into, all repurposed and thrifted of course - a few flannelette sheets, a duvet cover and possibly a table cloth.

This one is of the 'encourage Maria to get properly ready for bed' variety. I've used the basic idea from this Toddler Nightgown Free Pattern, but Maria is a little older so I based it on one of her tops that fits her now for the sizing. As well as a flannelette sheet, I used an old sun dress of Maria's.

Got a bit carried away and chopped it before I took a photo!
It was much too small for her and the shirring was losing all its elasticity, so it really was only good for the chop. And I thought the bottom of it would be perfect for the bottom of the nightgown.

When I laid it out though, I felt it needed a little bit extra to it.


So I added a white flounce as well.


I actually really liked it with just the white bottom, it had a bit of a 60's feel to it I thought, and was quite Maria like. Might have to do something else along these lines...


But for this, I carried on and added the second flounce.


One thing that's always great about repurposing old clothes or curtains or whatever, is that so often some of the work is already, and beautifully, done for you - like the frilled hem here.


I just used the instructions for the original nightgown for the neck and arms - they were very straightforward.


All in all it was surprisingly quick, easy and fun to make. You might know by now that I'm not a big maker of clothes. I liked the idea of nightgowns because, if they're a bit rough and ready, no one will really get to see them except us, but actually I think I could happily make a dress, or two, in this style as well.

Hopefully I might have a different one finished for Venetia to show you tomorrow, it's almost done. Have you got any favourite night gown patterns or styles that you've made in the past that could be good for my next one after that?

Sally.

Friday 26 September 2014

This Moment

Here's a link to Soulemama's moment, and here's mine...

. . . . . . . . .
{this moment} ~ A Friday ritual. A single photo - no words - capturing a moment from the week. A simple, special, extraordinary moment. A moment I want to pause, savor and remember. If you're inspired to do the same, leave a link to your 'moment' in the comments for all to find and see.
. . . . . . . . . .


Thursday 25 September 2014

'Sardines Are Swimming' Mini Quilt


This is my new, favourite Mini Quilt!

It started, back here, with Venetia and Maria painting the background fabric and then lots of different patterns on some muslin - which became the fish. I just sewed these on raw applique style. You might remember, all my mini quilts have a quote or words of some kind. This one reminded me of a song I used to sing at school when I was quite little - 'Apusski dusky'. It's from a song book called 'Apusskidu'. I picked up an old copy of the book at a charity shop a while back, and we all like lots of the songs in there (Michael Finnegan, Bananas in Pyjamas, Lily the Pink, She'll be coming round the mountain, Yellow Submarine, Morningtown Ride, I whistle a happy tune, Frog went a courting... Are these ringing a bell with any of you? Maybe you sang them at school too?). I don't know why the 'Apusski dusky' song has always stuck with me, it's not one of the better known ones, but it has. Here are the words to it:

In middle ocean,
Sardines are swimming,
Apusski dusky, appuskidu.
A boat sails over,
Down comes a net.
Apusski dusky, appuskidu.

One wise old sardine
Flicks out a warning,
Apusski dusky, appuskidu.
Swift through the water
They dart away.
Apusski dusky, appuskidu.

With tails a-flashing,
Sardines are swimming,
Apusski dusky, appuskidu.
So full of joy that
They're swimming free.
Apusski dusky, appuskidu.


Anyway, I picked a line from this for my words, added a few swirly, bubbly lines of quilting, some sequins for eyes and that was it. Not at all complicated, but I really do love it.

Maria and I took it to the beach today for photos. Unfortunately it was quite a grey day, and extremely windy. Maria tried very hard to hold it up for me to photograph, but it was tricky...


That wind was just a bit too gusty! We finally gave up and laid it out flat.


I love how the paint splatters, which the girls just flicked all over the background fabric, work so well with the bubbly, watery, ocean effect.


And it's hard to get the effect in a photo, but I also love how the sequin eyes sparkle in the light.


This one just feels, to me, the perfect combination of fabrics, design, words, feelings and memories. And even better for being a collaboration with the girls. It makes me happy! Have I said I love it yet?!

Have you got any art work up in your house, either made by yourself or someone else, that makes you happy? And do you have a favourite song from your childhood?

Sally.


Wednesday 24 September 2014

Christmas Star Garland


I am really trying to start getting organised with my Christmas making plans. This was my one and only New Year's Resolution for 2014 after all, and not much has been happening so far. I have a couple of presents started, but Venetia has beaten me to a finish. She saw these stars on Pinterest a while back and wanted to make some:


The part she found hardest with these was drawing stars she felt were good enough. I was sorely tempted to jump in and draw them for her, especially as she was desperate for me to do that, but I managed to resist and let her struggle on until she had got something she was happy with. She cut out paper templates and drew around them on to her fabric choices with my water soluble pen.


What I did jump in and do was cut out the fabric for her - cutting fabric into complicated shapes seems quite a hard thing to me, fabric scissors aren't the easiest for small hands, and reasonably cut stars were pretty crucial to the success of the project.

Once they were all cut, Venetia sorted them into piles ready to sew.


She wanted to make a star garland rather than just single stars, so she started out sewing her largest star on to some brown twine, and then layered up the other stars, sewing them one at a time. The large backing star was yellow wool each time, to give the stars a good hanging weight.


It was a really good project for her because, I think, wobbles and imperfections don't detract from the charm of the stars. I like projects like that too!


It was also good in that it came together fairly quickly. And I'm looking forward to hanging them up at Christmas.


The children are all going to make at least one home made present for someone for Christmas. I'm hoping Venetia might choose to make another star garland for somebody, I think it would be a lovely present.

So how are you doing with any Christmas making? Made a start yet? Or have you got any amazing ideas lined up? Any sharing of amazing ideas would be most appreciated - particularly amazing ideas for boys! I do find teenage boy making quite tough, but - with apologies for lowering the tone! - this image from Facebook seemed quite appropriate...


I was very disappointed to find it didn't lead to a place to buy these, but then this does open up a making opportunity. I'm thinking of maybe using some of those charcoal shoe insoles that absorb smells, or possibly just a slim lavender bag patch... Not completely sure yet but there's definitely a present making opportunity here! However any other boy ideas you might have would be great too!

And I'm linking up with Celtic Thistle Stitches, who is far more organised than I am and has had a 'Ho, ho, ho and on we sew' theme going on all year, once a month. Pop over for a look at the September makes, or if you're doing a bit of holiday making yourself then you've got till the end of the month to link up your own project over there.

Sally.

Tuesday 23 September 2014

Child's drawing to Mini Quilt


Warning - as well as sharing a Mini Quilt, this post has a philosophical, parenting slant!

I was lying in bed the other night after not managing to post anything here for the day, drifting off to sleep and wishing there had been more hours in the day to squeeze in the time to have written here. And also half bemoaning (silently!) the fact that I don't just blog about our everyday life and happenings. Instead,  I felt, I have to squeeze two lots of time out of the day - for the making as well as for then writing about the making. How much easier would it be to just write about our ordinary, every day happenings, and then it would only be one lot of time I'd be trying to squeeze?

But then it hit me yesterday that, actually, the making is so ingrained into not just my life, but the children's lives as well, that in fact I am really just trying to write about our everyday life and happenings.

Does that make sense? My example yesterday was a small present I was trying to make for the wonderful lady who 'founded' our beloved, local Montessori Pre-school. It was their last day today and Maria and I went along, to say goodbye and hand over the quilt we made for Maria's favourite teacher. But, because they are so sadly closing, I really wanted to make something for the original pre-school leader to remember 'Little Oaks' too. She was there with both Theo and Venetia, and, though her role had changed and moved out of the classroom, she was still very much involved when Maria was there as well.

I started off trying to make a small, machine embroidered mini quilt version of the larger quilt. Time was a little limited, so I decided I'd try using paint as well as fabric and thread. Maria sat down with me, drawing and painting alongside me. Helping Maria with her work meant my time became more and more limited and I used a pen rather than purely thread for a lot of my detail.

The little girl and quite a few leaves were sewn, then I switched to pen - although eye, nose and mouth were in pen as well.


Maria loved using the proper water colours that I dug out and painted very happily with them. My painting didn't go quite so well. I misjudged how much 'bleed' I would get from the wet paint into the fabric.


I carried on, trying to work the 'bleed' into the design a bit...

This is when it was quite wet still, it dried a little less blotchy but not wonderfully even.


But I really wasn't happy with it. Next to me though, Maria had quietly started creating her own version of a little girl throwing up leaves. I persuaded her to draw it directly on to a piece of fabric instead...


She used my special pen which can be removed by ironing the fabric, and she thought this was amazing. To the point where she drew quite a few things just for the sake of getting me to magicly remove them - like the words above! Happily in her final version of her drawing the little girl had wellies rather than all those toes to sew (I may have just mentioned that those toes would be a bit cold outside without boots!).

I just started sewing a red stripe before I remembered to take a photo!

The stripes had remained and Maria wanted rainbow stripes. Here's how she finished up.


I added the writing (really not my best, Maria had run off with my pen at this point and I did it 'blind' which was a bad idea!), popped a piece of wool on the back, quilted a simple oak leaf to hold it together and then it just required some binding.

I had used the middle of an old, vintage, embroidered table cloth for the main piece of fabric, and I found an old, cross stitched table runner which toned in really nicely with it for the binding.


It took a good few hours to make, from start to finish with the original failure too, but most of that was with Maria working alongside me. It was very much part of our day together.

And as well as helping me realise how much making is 'every day' for us, I also realised, anew, how much Maria, and all the children, are influenced by what I do. Not just in the subject matter that she chooses to draw or paint...

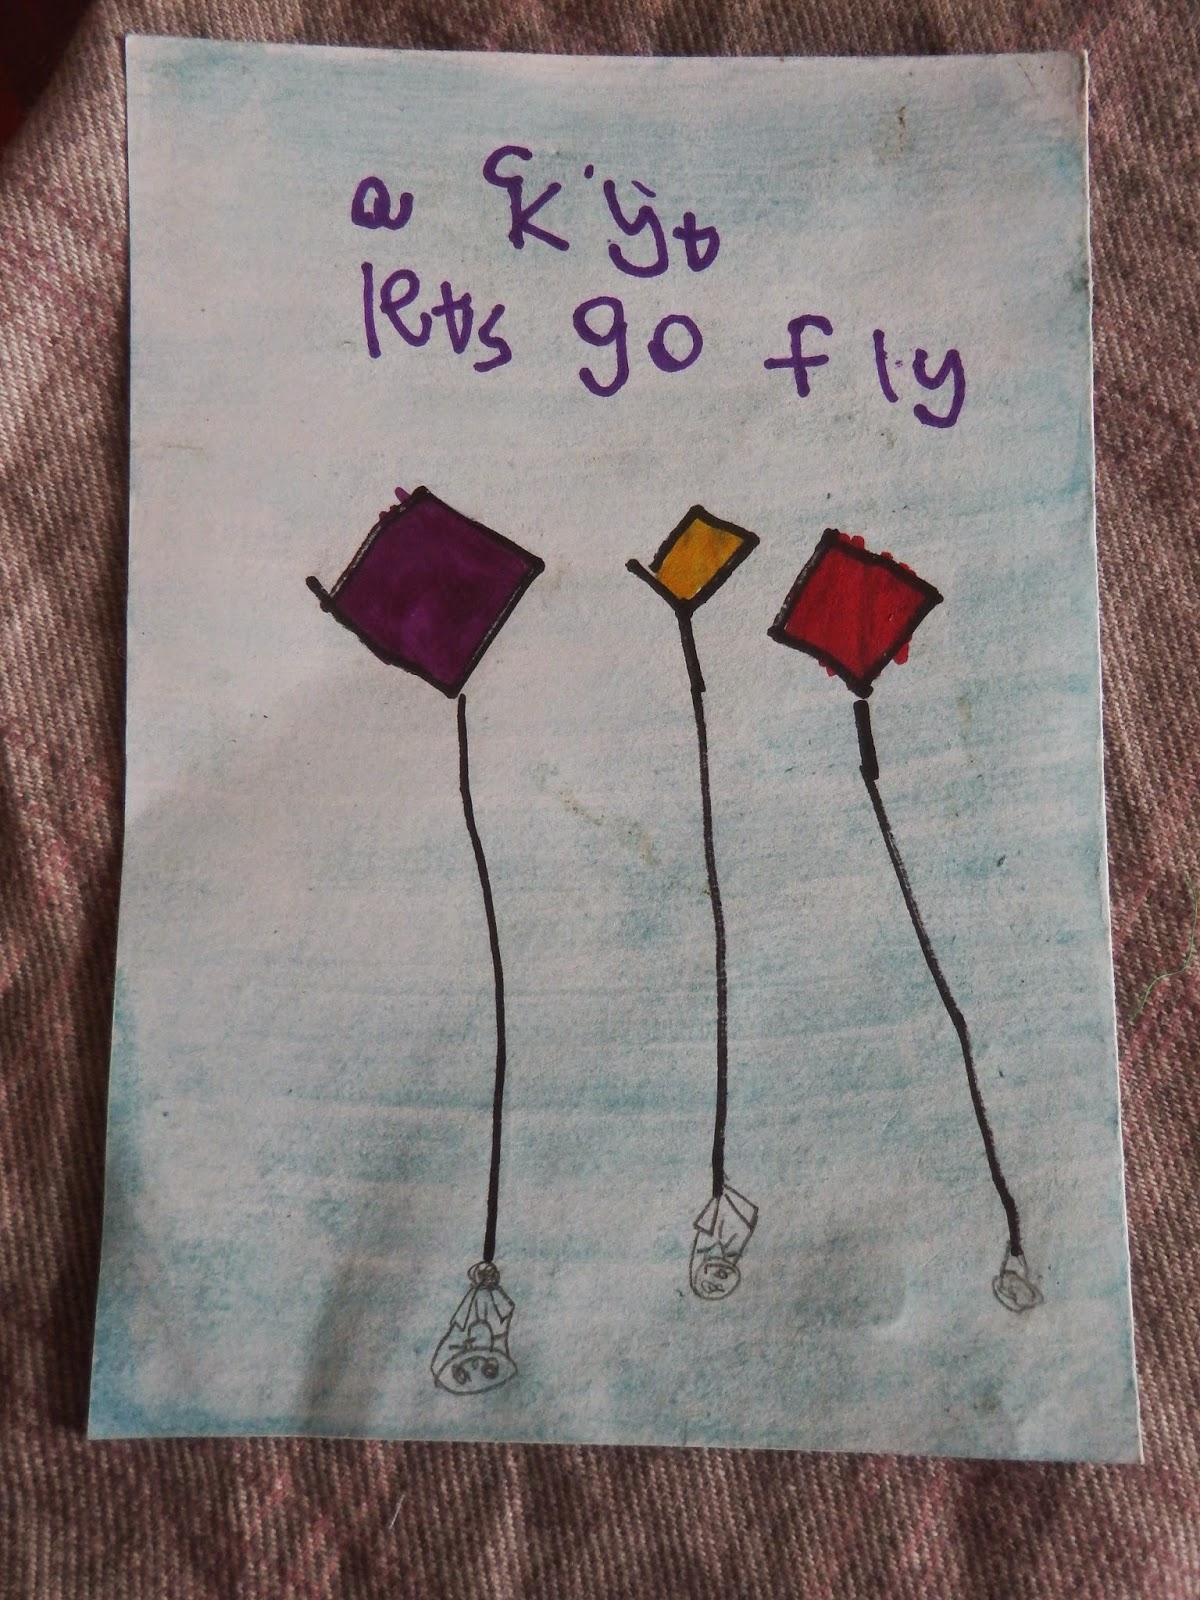
Here's a 'Thank You' card she came running in to show me as I was making the Kite Mini Quilt.


But just in the fact that she loves to create. More than that even, she sees creating things as something natural and every day. Just as eating 3 meals is natural and every day. It's not something we make time for whenever we get a chance, it's something we do every day. Just as she sees that I love books and love reading, again that's an every day occurrence here, not just a 'have we got time for it today?'. It's the things that are 'every day' for us that are ingrained habits. And, I know it's obvious, but I realised it's not what I tell them to do or encourage them to do, that counts the most. It's what I do that counts the most, what they see me doing not just saying. It applies to so many different areas - the best way to get them to spend time outside is to spend time outside yourself, you want your children to eat everything, you eat everything (I fail big time on this one!)... Of course, it's not completely fool proof, I'm sure there are lots of parents out there who happily eat everything and have fussy eaters, but it's a start and I think the main step. So many of us would look back on our parents now and realise how much they influenced us with their actions.

It's a thought that has cropped up in other areas of my life recently, not just parenting. 'Doing' is so much more important than just the words. And I'm trying to think of an elegant phrase for it - put your money where your mouth is? Actions speak louder than words? Are there any better ones out there for this? Whatever the exact phrase, it's a creed I'd like to live my life by.

Sally.


Friday 19 September 2014

This Moment

Here's a link to Soulemama's moment, and here's mine...

{this moment} ~ A Friday ritual. A single photo - no words - capturing a moment from the week. A simple, special, extraordinary moment. A moment I want to pause, savor and remember. If you're inspired to do the same, leave a link to your 'moment' in the comments for all to find and see.
. . . . . . . . . .