I came across CraftyPod a couple of weeks ago when I was searching for some help getting to grips with 'watermarking' my photos - there was a very useful post on that, but I still haven't managed to get started with it, I got a bit distracted having a good browse round the rest of the blog!
There are quite a lot of quilting related posts which caught my eye for a start. Diane, who writes the blog, has also just had a quilting book published - Quilting Happiness - and she's recently done several posts on quilting stories she collected that didn't manage to make it into the finished book. And since I've really enjoyed reading the reject bits of the book, I think maybe I'd love the actual book - I have high hopes that it may be winging its way to me as a birthday present from my lovely Mother-in-Law, so I'll let you know!
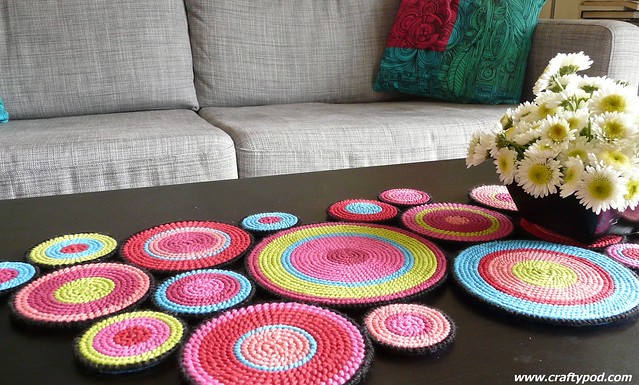
But, as well as the quilting, my eye was very much caught by posts on plastic canvas. Not something I'd seen anything of before, but as soon as I saw these plastic canvas circles in a table runner...
 |
| Spot the perfect little 'www.craftypod.com' watermark at the bottom of the photo, that's what I need to get started on! |

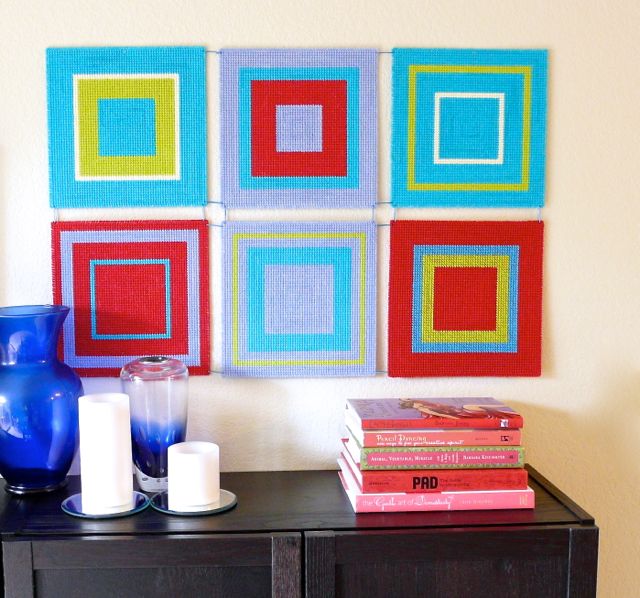
I think I'm going to need nine of them, and since they do take quite a bit of time I'm very glad I've got some enthusiastic helpers in the children! But it's not just circles that you can do. Take a look at another one of Diane's pieces - a beautiful plastic canvas wall hanging
(By the way, Diane also has a crafty mum, who has her own blog, with a very handy stitch tutorial here.)
And since starting our own plastic canvas project I've realised that I did actually have something already in the house made from the stuff...
A quaint little cottage - bought in a charity shop (of course!) for next to nothing. Although at the time I didn't appreciate exactly how it was made, it was obvious that someone had lavished a huge amount of time and love on it - exactly the kind of thing I couldn't leave sad and lonely in a shop! I don't know whether you can see from the photo above but it's 3D, the roof was sewn on but I unpicked it so that it's now removeable - not such a strong structure anymore but perfect for lots of play opportunities.
 |
| The plastic canvas has been lined with fabric throughout and stitched together to create the structure. |
Here are a few more ideas on ways to use it from Pinterest:

http://www.pinterest.com/pin/165929567494521789/

http://www.pinterest.com/pin/279082508131346814/

http://www.pinterest.com/pin/279082508131389416/

http://www.pinterest.com/pin/279082508131404063/
With Christmas approaching it seems to me to be something with lots of potential for:
- Giving as a present to a craft loving child (or grown up!)
- Turning into Christmas decorations (you can get precut star shapes for a start)
- Using it to make homemade presents - quite possibly getting your children to do the making, something like those bright, colourful pendants for example.
Back tomorrow, Sally.


Yaaay for plastic canvas! I can't wait to see how your bunting turns out - what a great idea! The weight of the canvas pieces should make it hang really nicely, too. And I'm so glad you gave that little house a good home. It always makes me sad to see projects someone worked hard on languishing in a thrift store somewhere.
ReplyDeleteDon't worry - watermarking takes time to adopt. I still forget all the time and have to go back into my photos and add them later. Just keep the intention, and soon it'll become part of your bloggy routine. Thank you so much for stopping by the blog!
Thanks so much forhaving a read and taking the time to comment. And definitely 'Yaaay' for plastic canvas, you've definitely started something off in this house! I'll let you know how the bunting turns out, I have high hopes for it!
ReplyDelete