 |
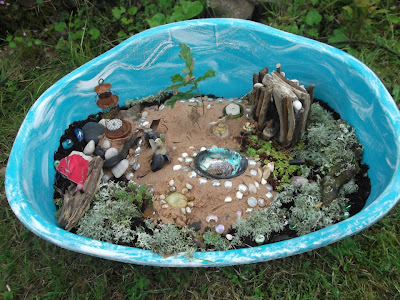
| This one was made from an old dog bed and lots of found bits and pieces. |
It's the bottom of a bottle that has been beautifully smoothed by time. Each one of us looked at it, independently, and immediately said it looked like a tiny throne - perfect for a fairy. From this the idea of making a Fairy Garden for royalty was born. This seemed even more fitting after the birth of baby George and all the royal fever over here.
The last couple of days we've been busy gathering bits and pieces together, making, painting and decorating, all in preparation for our Royal Fairy Garden.
These are some interesting scraps and off cuts of wood that we have lying around from the building work that's going on at the moment. (If you don't have scraps lying around and wanted to make this kind of thing it would be quite cheap and easy to get a bit of wood from a sawmill or DIY shop and with a few straight cuts turn it into some interesting shapes.) These were to be our Fairy castle. A couple of them needed squaring up at one end so they would stand up, but then they went straight to Venetia to draw a bit of a design on them in pencil.
 |
| She did a quick sand over the edges too. |
I then burnt this design on with my wood burner - but you could skip this part or maybe just use a permanent marker, either before or after painting, to help the design stand out.
Now we were on to the really fun part - painting! Both girls loved this.
 |
| We gave them a quick coat of outdoor varnish too. |
All of a sudden the castle was looking a lot more colourful, as were the girls!
Venetia decided that the royal fairies would need a royal playground to keep them entertained. With a few more scraps of wood we scavenged, it was easy to create a slide and a seesaw (put together with just some wood glue). Theo took an interest when the drill came out and put together a roundabout for us.
The swing is still under construction - very wobbly at the moment to say the least - I think we might need more than just wood glue for this.
While all the paints were out we cut a few butterfly and bee shapes out of used plastic milk bottles and decorated them.
I just threaded some thin elastic through on a needle when they were dry.
As the Fairy Garden became more and more colourful it felt like this might be the right time to try and make these hanging ornaments that I'd seen on Pinterest a while back, here.
| It's just cheap, plastic beads put into cake tins in a really hot oven until they've melted. |
I was a bit sceptical about whether this would actually work, or whether it would make a horrible, burnt, smelly mess in one of my baking tins (I used a very old tin to start with!). But, amazingly, it worked!
 |
| Once they were cool I just drilled a hole to hang them up, that was easy too - no hint of them cracking or anything. |
 |
| This one just had beads around the edge |
Then it was time to take all our makes and find a good site for them. We decided on a spot up against our old garden shed. It needed a bit of easy clearing and then just a matter of arranging the new fairy bits and pieces.
 |
| Painting stones is a regular favourite and these ones we already had fit in well. |
We used a couple of bits of twisty driftwood pushed into a handy hole to hang our butterflies.
The beaded ornaments dangled well from the ivy growing above the window.
These dragonflies we made a while back, from pipe cleaners, wooden beads and sweet wrappers foil, they were very easy but I haven't got any photos I'm afraid. We might make some more soon though...
So here it is altogether:
 |
 |
| I think the stepping stones are one of my favourite parts. |
 |
| The girls, in particular, have loved making it and hopefully will get lots of fun playing with it. |
It's positioned right on the way in from where we park to our front door, and I think, everytime we get home and walk in, this splash of crazy colour on our way will make me smile.
The only sad thing - remember our beautiful sea glass throne that started the whole process? I really don't think it fits in very well with what we've created!
It's just a bit lost in all the bright colours I think. Next year we'll have to do a more natural, subtle Fairy Garden and the throne will look perfect.
Don't forget to have a look at all the stunning entries over at The Magic Onions and I'll be back tomorrow with our photo of the week, Sally.


Shame we're going away today...I know 2 small people who would love to come and play!
ReplyDeleteDefinitely, when you come back! Are you away long? X
ReplyDelete